Administrators use the Database Console Command (DBCC) to check the physical and logical integrity of the objects in the Microsoft SQL Server Databases. The commands used for this purpose include:
- DBCC CHECKALLOC: Executed on the database
- DBCC CHECKTABLE: Executed on every database table and view
- DBCC CHECKCATALOG: Executed on the database
DBCC also resolves the SQL database corruption issues by performing the necessary repair operations. But, if DBCC CHECKDB cannot repair the SQL database corruption, then third-party SQL database repair tool would be helpful.
Repairing SQL database with DBCC CHECKDB
Open SQL Server Management Studio and follow the steps mentioned here to repair your corrupt database with the help of DBCC CHECKDB command. Before that, ensure you have administrative privileges and MS SQL Server Management Studio (SSMS) on your PC or laptop.
Please note that in the database repair steps mentioned below, we will use SQL_TEST_DB as our database name. You can replace it with your database when doing the repair process.
1. Set your Database status to EMERGENCY mode
Run the query given below in SSMS to set the database in EMERGENCY mode:
ALTER DATABASE [SQL_TEST_DB] SET EMERGENCY
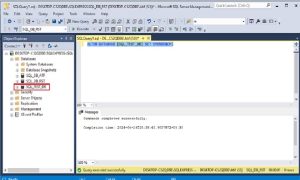
This will provide you (administrator) with read-only access to the database.
You can check the status of your database by running this command in the SSMS query window.
SELECT name, state_desc FROM sys.databases
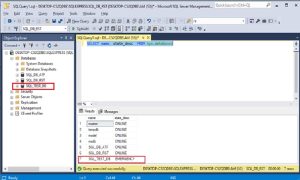
Alternatively, you can also check the status of your database by going through the following easy steps:
- Select the corrupted database
- Right-click the database
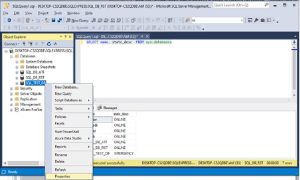
- Click on the last option, Properties
- In the Properties box, click Options
- On the right side of the Property box, navigate to the bottom
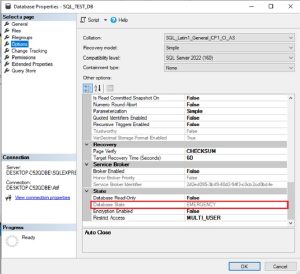
- You will find the Database State as EMERGENCY as you can see in the image above.
2. Check your database for corruption errors
Next, you need to find out the SQL database corruption errors in the database by executing the DBCC CHECKDB command.
DBCC CHECKDB (SQL_TEST_DB)
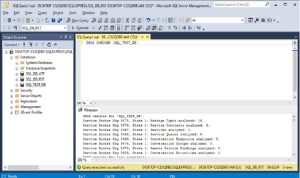
3. Set the corrupt database in SINGLE_USER mode
You can do this either with the help of SSMS Graphical User Interface or by executing Transact-SQL (T-SQL) Commands.
i. Set SINGLE_USER mode By GUI:
- Right-click the SQL database having corruption
- Click Properties
- In the resulting Database Properties Window, select Options
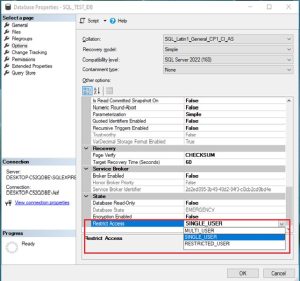
- On the right side, navigate to the bottom of the box to find Restrict Access under State
- Click the drop-down arrow next to it and select SINGLE_USER
- Click OK.
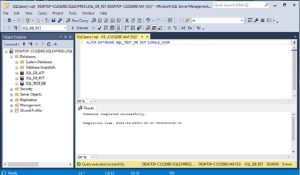
ii. Set SINGLE_USER mode By SQL Command
Alternatively, you can run the following command in the Query window.
ALTER DATABASE SQL_TEST_DB SET SINGLE_USER
4. Repair your SQL Server Database
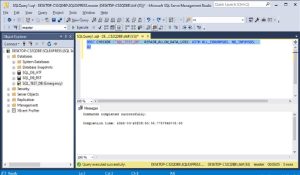
Now is the time to repair your corrupted database. Since you have already set the database to SINGLE_USER mode, you can run CHECKDB DBCC command with the option of REPAIR_ALLOW_DATA_LOSS. Here is the command.
DBCC CHECKDB (‘SQL_TEST_DB’, REPAIR_ALLOW_DATA_LOSS) WITH ALL_ERRORMSGS, NO_INFOMSGS;
GO
You may use several options with REPAIR_ALLOW_DATA_LOSS as given in the syntax below:
REPAIR_ALLOW_DATA_LOSS | REPAIR_FAST | REPAIR_REBUILD
Let’s learn the options one by one.
REPAIR_ALLOW_DATA_LOSS: Repairs all the errors in the database but can lead to some data loss.
REPAIR_FAST: Helps to maintain syntax for backward compatibility without performing any repair task.
REPAIR_REBUILD: Performs time-consuming repairs such as index rebuilding. At times, it can also perform quick repairs like repairing misplaced rows in non-clustered indexes. It does not repair errors related to FILESTREAM data.
Please note that REPAIR_ALLOW_DATA_LOSS may not always be the best method to repair a database. This is because, despite successful database repair, this option can lead to significant data loss. It should be the last emergency option in the absence of any backup for database restoration. It is better to check the referential integrity of the database with the help of DBCC CHECKCONSTRAINTS option after using REPAIR_ALLOW_DATA_LOSS.
5. Change the mode of your repaired database to MULTI_USER
After repairing your corrupted database successfully with the help of REPAIR_ALLOW_DATA_LOSS, change the mode to MULTI_USER. Here is the command:
ALTER DATABASE SQL_TEST_DB SET MULTI_USER
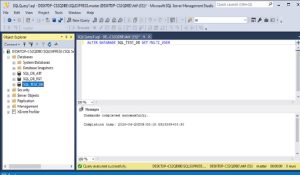
Alternative to DBCC CHECKDB for repairing SQL database corruption
As already mentioned, executing REPAIR_ALLOW_DATA_LOSS command with DBCC CHECKDB might delete several database pages, leading to significant data loss. At times, the DBCC CHECKDB might not be able to solve the SQL database corruption issue, and return error. Using an advanced SQL database repair tool, such as Stellar Repair for MS SQL would be suitable in this regard.
It offers a wide range of features:
- Assists the administrators to regain database access quickly and with the least manual efforts
- Ensures that no data loss during the repair process
- Repairs MDF as well as NDF files
- Recovers all the important components of a database including triggers, stored procedures, tables, keys, indexes, etc.
- Recovers deleted data from the MS SQL database
- Extracts data from damaged file
- Allows for selective recovery of the database objects
- Lets you preview all the SQL database objects that can be recovered
- Recovers SQL tables having ROW and PAGE compression
- Supports all the SSMS versions from 2008 to 2019 and even lower versions
- Can save the repaired databases in 4 different formats – MDF, CSV, HTML and XLS
Repairing SQL database corruption through Stellar Repair for MS SQL
Here are the steps to recover a corrupted SQL database with the help of this SQL database repair tool
- Download the .exe file SQL database repair tool from the Stellar Info website
- Install and launch the software on your PC or laptop
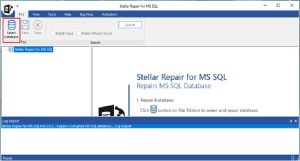
3. Click Select Database.
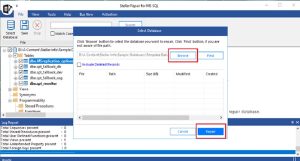
4. In the ‘Select Database’ dialog box, click the Browse button to choose the database that needs repair
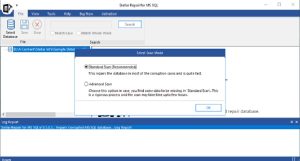
5. Select from the ‘Standard Scan’ or ‘Advanced Scan’ options.
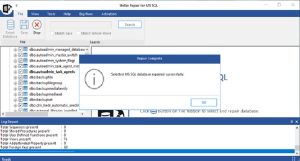
6. On successful repair, you will see the message, ‘Select MS SQL database repaired successfully’.
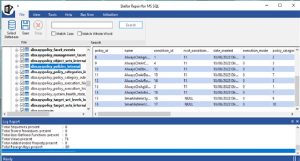
7. Preview the objects of the recovered SQL database
8. After verifying the data, Save the file by clicking FileàSave
9. Save the repaired database in any of the given file formats including MDF, CSV, XLS, or HTML.
10. Click Next.
11. Enter connection details to SQL Server instance. Click Next.
12. Choose from among Fast Saving or Standard Saving modes to save the recovered SQL database. Click Save.
13. Next, you will see the saving status of the tables as Completed, Processing, Pending, or Aborted.
14. Once saved, you will get the ‘File Saved Successfully’ message.
15. You can find the recovered database in the saved location.
Final Words
Administrators often use DBCC CHECKDB command to deal with SQL database corruption. The options to check the logical and physical integrity of the SQL database include DBCC CHECKALLOC, DBCC CHECKTABLE, and DBCC CHECKCATALOG. Likewise, the options to repair the database in combination with REPAIR_ALLOW_DATA_LOSS include REPAIR_FAST and REPAIR_REBUILD among others.
At times, the manual method may give errors or fail to resolve the problem of SQL database corruption. To remedy this situation, admins prefer using an SQL database repair tool loaded with multiple features, it ensures quick and hassle-free recovery of the database. Moreover, it ensures no data loss during the recovery process.
To know more on how to tackle the issue of SQL database corruption through Stellar Repair for MS SQL, feel free to contact Stellar Info. You can get ample information about the SQL database repair tool from the Stellar Info website itself.


